构建项目和实现代码生成的Java Fluent Mybatis方法
来源:亿速云
2024-02-05 17:25:54
0浏览
收藏
最近发现不少小伙伴都对文章很感兴趣,所以今天继续给大家介绍文章相关的知识,本文《构建项目和实现代码生成的Java Fluent Mybatis方法》主要内容涉及到等等知识点,希望能帮到你!当然如果阅读本文时存在不同想法,可以在评论中表达,但是请勿使用过激的措辞~
特性
看一下官方给出的特性图
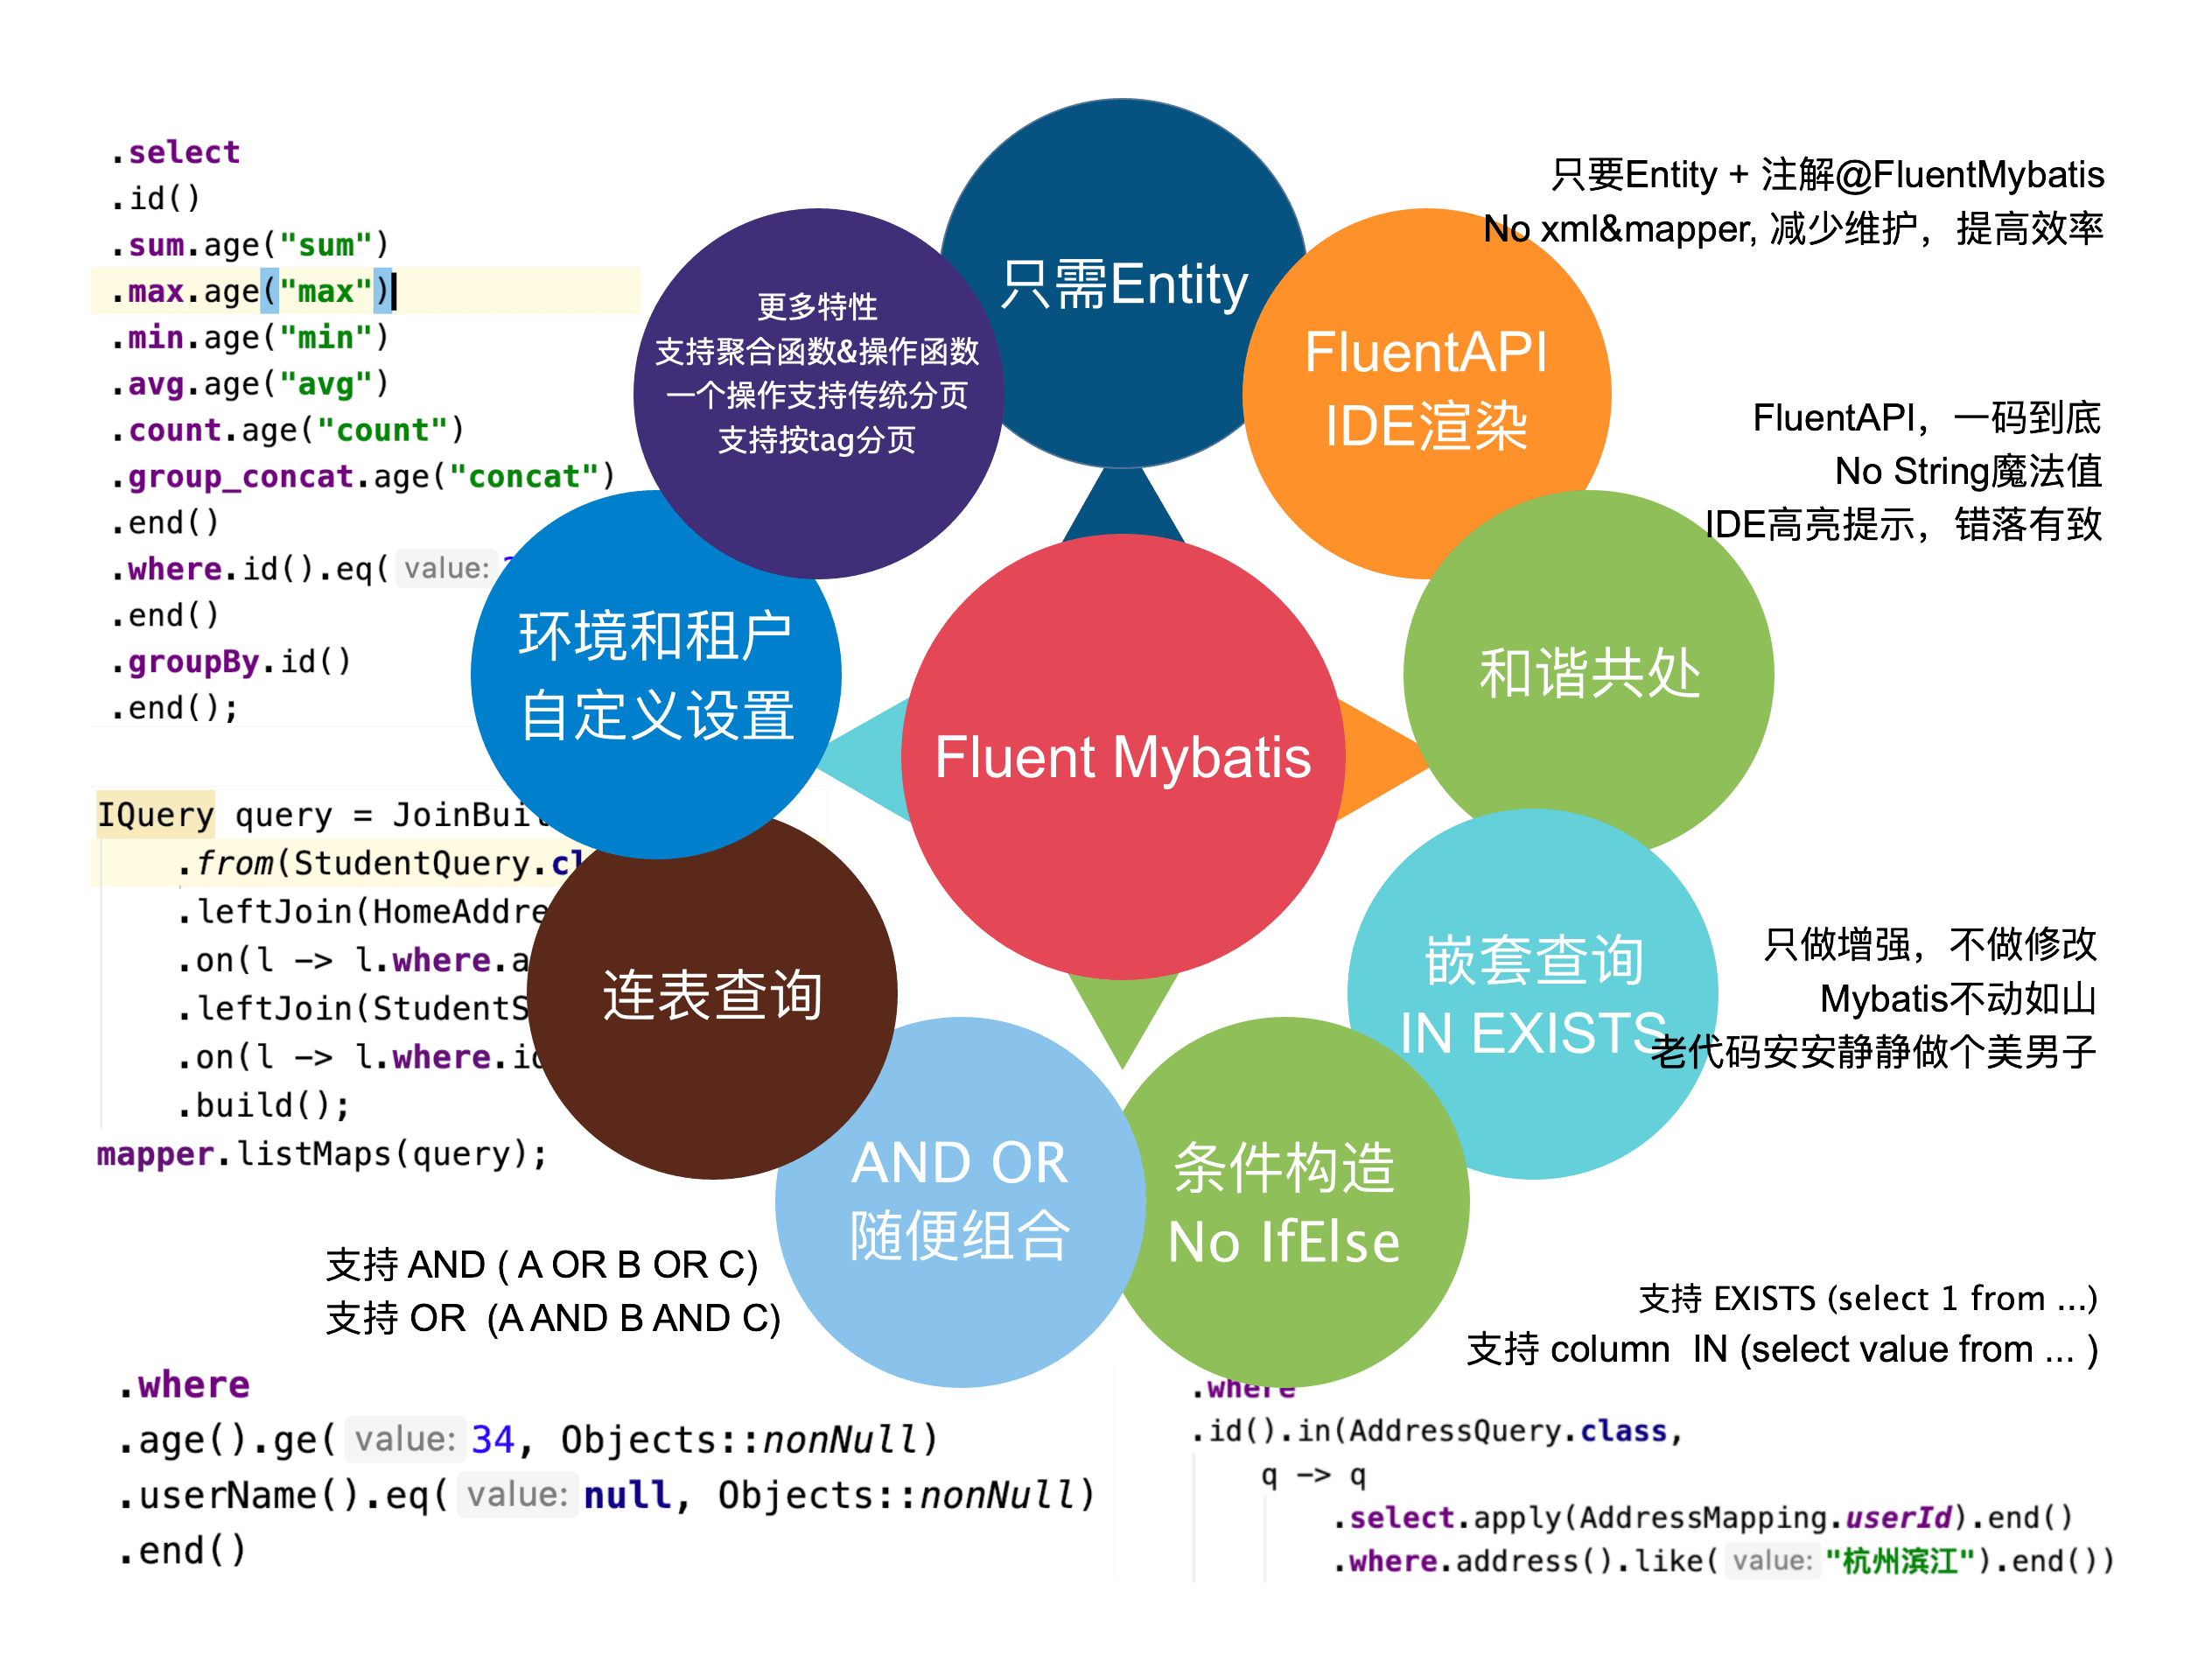
给出对几个特性乍一看还是很全面的,其中比较吸引我的是两点。
1、从图中给出的语法,和sql十分相近,不仔细看还以为是直接sql语句扔了上来。看上去就比较实用。
2、No xml&mapper,虽然mybatis-plus已经做到实用 IService接口实现大部分的sql操作
项目搭建
springboot搭建一项目的过程就不过多赘述了,这里说下我实用的springboot版本
<parent>
        <groupId>org.springframework.boot</groupId>
        <artifactId>spring-boot-starter-parent</artifactId>
        <version>2.5.5</version>
        <relativePath/> <!-- lookup parent from repository -->
    </parent>
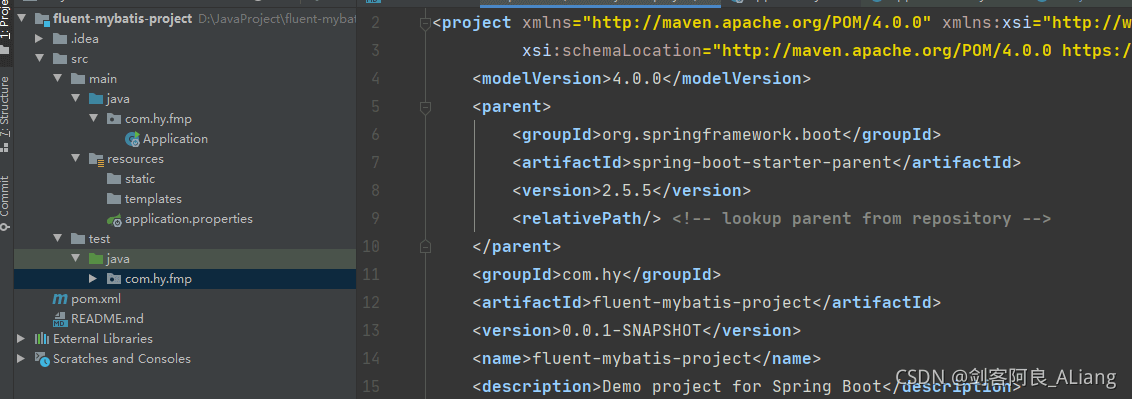
代码结构如下:
maven依赖引入-fluent-mybatis
<properties>
    <fluent-mybatis.version>1.8.7</fluent-mybatis.version>
</properties>
<dependencies>
    <!-- 引入fluent-mybatis 运行依赖包, scope为compile -->
    <dependency>
        <groupId>com.github.atool</groupId>
        <artifactId>fluent-mybatis</artifactId>
        <version>${fluent-mybatis.version}</version>
    </dependency>
    <!-- 引入fluent-mybatis-processor, scope设置为provider 编译需要,运行时不需要 -->
    <dependency>
        <groupId>com.github.atool</groupId>
        <artifactId>fluent-mybatis-processor</artifactId>
        <scope>provided</scope>
        <version>${fluent-mybatis.version}</version>
    </dependency>
</dependencies>
完整maven依赖如下
<?xml version="1.0" encoding="UTF-8"?>
<project xmlns="http://maven.apache.org/POM/4.0.0" xmlns:xsi="http://www.w3.org/2001/XMLSchema-instance"
         xsi:schemaLocation="http://maven.apache.org/POM/4.0.0 https://maven.apache.org/xsd/maven-4.0.0.xsd">
    <modelVersion>4.0.0</modelVersion>
    <parent>
        <groupId>org.springframework.boot</groupId>
        <artifactId>spring-boot-starter-parent</artifactId>
        <version>2.5.5</version>
        <relativePath/> <!-- lookup parent from repository -->
    </parent>
    <groupId>com.hy</groupId>
    <artifactId>fluent-mybatis-project</artifactId>
    <version>0.0.1-SNAPSHOT</version>
    <name>fluent-mybatis-project</name>
    <description>Demo project for Spring Boot</description>
    <properties>
        <java.version>1.8</java.version>
        <fluent-mybatis.version>1.8.7</fluent-mybatis.version>
    </properties>
    <dependencies>
        <dependency>
            <groupId>org.springframework.boot</groupId>
            <artifactId>spring-boot-starter-web</artifactId>
        </dependency>

        <dependency>
            <groupId>org.springframework.boot</groupId>
            <artifactId>spring-boot-devtools</artifactId>
            <scope>runtime</scope>
            <optional>true</optional>
        </dependency>
        <dependency>
            <groupId>org.springframework.boot</groupId>
            <artifactId>spring-boot-configuration-processor</artifactId>
            <optional>true</optional>
        </dependency>
        <dependency>
            <groupId>org.projectlombok</groupId>
            <artifactId>lombok</artifactId>
            <optional>true</optional>
        </dependency>
        <dependency>
            <groupId>org.springframework.boot</groupId>
            <artifactId>spring-boot-starter-test</artifactId>
            <scope>test</scope>
        </dependency>
        <dependency>
            <groupId>org</groupId>
            <artifactId>jaudiotagger</artifactId>
            <version>2.0.1</version>
        </dependency>
        <dependency>
            <groupId>com.google.guava</groupId>
            <artifactId>guava</artifactId>
            <version>30.1.1-jre</version>
        </dependency>
        <dependency>
            <groupId>cn.hutool</groupId>
            <artifactId>hutool-all</artifactId>
            <version>5.5.2</version>
        </dependency>
        <!-- 引入fluent-mybatis 运行依赖包, scope为compile -->
        <dependency>
            <groupId>com.github.atool</groupId>
            <artifactId>fluent-mybatis</artifactId>
            <version>${fluent-mybatis.version}</version>
        </dependency>
        <!-- 引入fluent-mybatis-processor, scope设置为provider 编译需要,运行时不需要 -->
        <dependency>
            <groupId>com.github.atool</groupId>
            <artifactId>fluent-mybatis-processor</artifactId>
            <scope>provided</scope>
            <version>${fluent-mybatis.version}</version>
        </dependency>
        <dependency>
            <groupId>org.mybatis.spring.boot</groupId>
            <artifactId>mybatis-spring-boot-starter</artifactId>
            <version>2.2.0</version>
        </dependency>

        <dependency>
            <groupId>mysql</groupId>
            <artifactId>mysql-connector-java</artifactId>
            <scope>runtime</scope>
        </dependency>
    </dependencies>

    <build>
        <plugins>
            <plugin>
                <groupId>org.springframework.boot</groupId>
                <artifactId>spring-boot-maven-plugin</artifactId>
                <configuration>
                    <excludes>
                        <exclude>
                            <groupId>org.projectlombok</groupId>
                            <artifactId>lombok</artifactId>
                        </exclude>
                    </excludes>
                </configuration>
            </plugin>
        </plugins>
    </build>

</project>
表构建
在数据库创建一张测试表,表比较简单,先试试看。sql如下:
CREATE TABLE `test_fluent_mybatis` (
  `id` int NOT NULL AUTO_INCREMENT COMMENT '自增主键',
  `name` varchar(255) DEFAULT NULL COMMENT '姓名',
  `age` int DEFAULT NULL COMMENT '年龄',
  `create_time` datetime DEFAULT NULL COMMENT '创建时间',
  `del_flag` int DEFAULT NULL COMMENT '是否删除',
  PRIMARY KEY (`id`)
) ENGINE=InnoDB DEFAULT CHARSET=utf8mb4 COLLATE=utf8mb4_0900_ai_ci;
代码生成工具类
注意:放到测试代码包中。结构如下图:
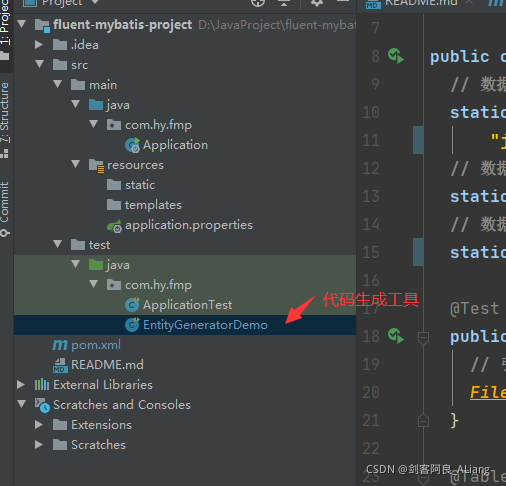
代码生成工具类代码,先按照官方给的简单样例来,如下:
package com.hy.fmp;

import cn.org.atool.generator.FileGenerator;
import cn.org.atool.generator.annotation.Table;
import cn.org.atool.generator.annotation.Tables;
import org.junit.jupiter.api.Test;

public class EntityGeneratorDemo {
  // 数据源 url
  static final String url =
      "jdbc:mysql://192.168.0.16:3306/test?useUnicode=true&characterEncoding=utf8";
  // 数据库用户名
  static final String username = "root";
  // 数据库密码
  static final String password = "123456";

  @Test
  public void generate() throws Exception {
    // 引用配置类,build方法允许有多个配置类
    FileGenerator.build(Empty.class);
  }

  @Tables(
      // 设置数据库连接信息
      url = url,
      username = username,
      password = password,
      // 设置entity类生成src目录, 相对于 user.dir
      srcDir = "src/main/java",
      // 设置entity类的package值
      basePack = "com.hy.fmp.fluent",
      // 设置dao接口和实现的src目录, 相对于 user.dir
      daoDir = "src/main/java",
      // 设置哪些表要生成Entity文件
      tables = {@Table(value = {"test_fluent_mybatis"})})
  static class Empty { // 类名随便取, 只是配置定义的一个载体
  }
}
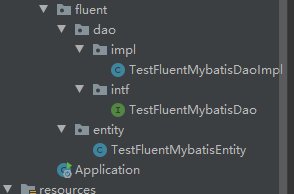
执行代码生成工具,看看都生成了些什么。
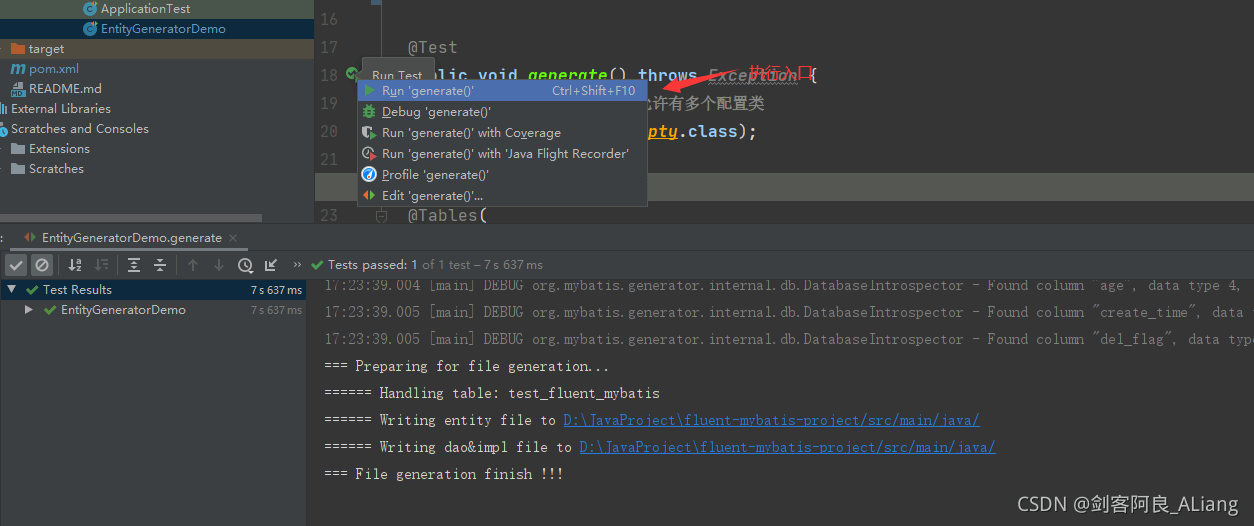
可以看到生成的包如下。
解决类找不到问题
这里有个坑,看下面的截图
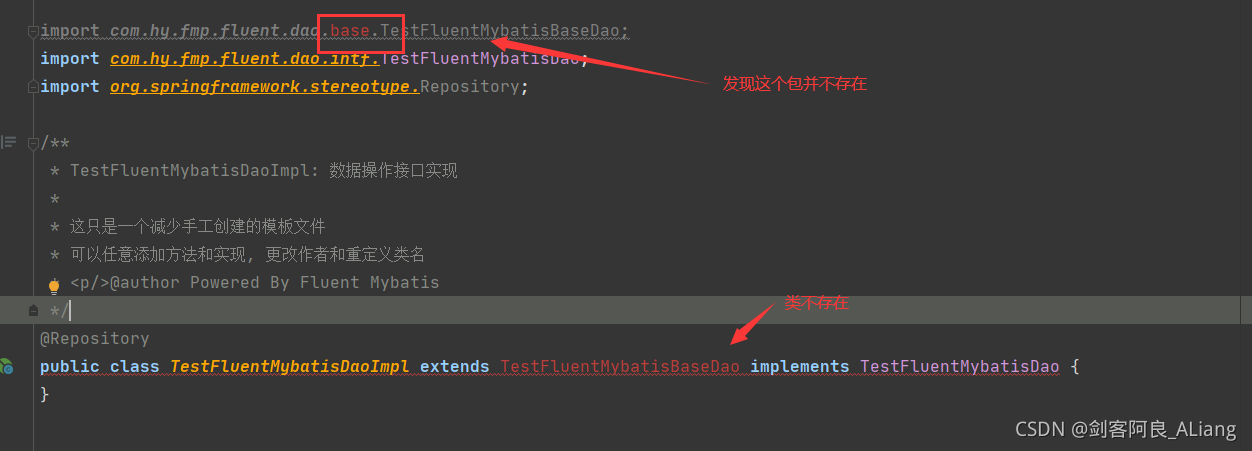
其实官方给了解决方法,只是没有对此说明。

简而言之就是你需要使用maven编译一下,所以我们compile一下。
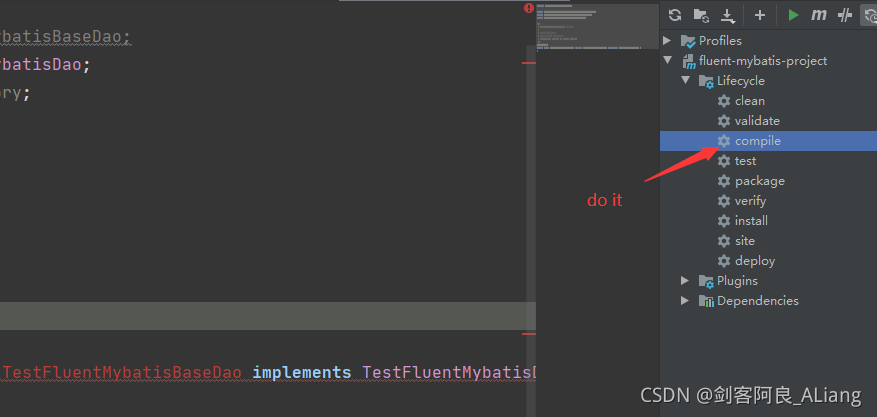
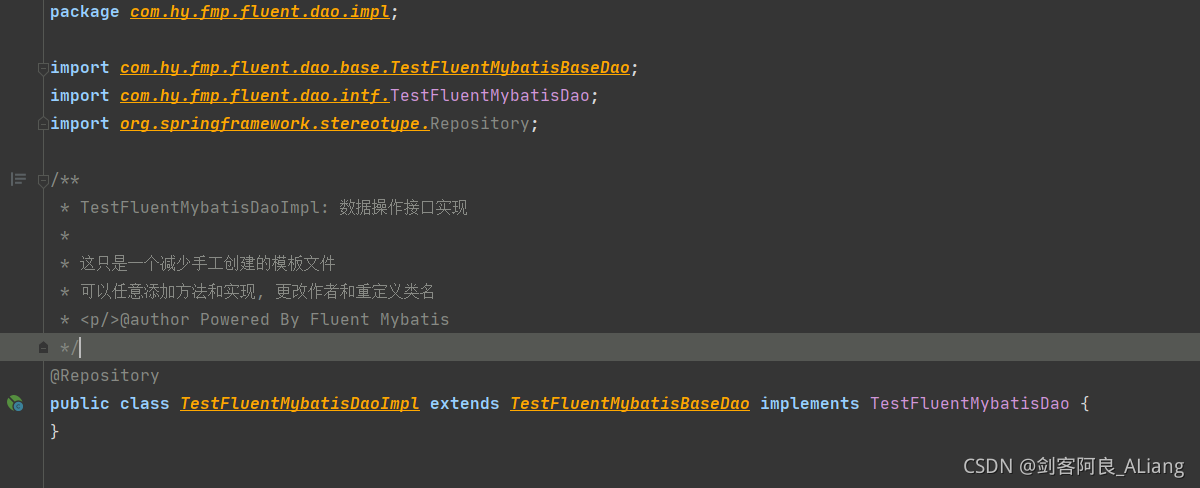
编译结束后我们可以在target中,找到报错包位置中的编译文件。

之前报错的类已经不再报错了。完美。
以上就是本文的全部内容了,是否有顺利帮助你解决问题?若是能给你带来学习上的帮助,请大家多多支持golang学习网!更多关于文章的相关知识,也可关注golang学习网公众号。
版本声明
本文转载于:亿速云 如有侵犯,请联系study_golang@163.com删除
 Windows10如何进行磁盘分区
- 上一篇
- Windows10如何进行磁盘分区

- 下一篇
- PHP开发中如何防止邮件中的外部导入漏洞?
查看更多
最新文章
-
- 文章 · java教程 | 5小时前 |
- SpringBoot动态注入接口方法解析
- 319浏览 收藏
-

- 文章 · java教程 | 5小时前 |
- Java订单支付与退款实现教程
- 269浏览 收藏
-

- 文章 · java教程 | 6小时前 |
- Java静态与实例成员区别解析
- 264浏览 收藏
-

- 文章 · java教程 | 6小时前 |
- Java环境变量配置验证方法
- 178浏览 收藏
-

- 文章 · java教程 | 6小时前 |
- Java基础项目:银行账户管理实现详解
- 183浏览 收藏
-

- 文章 · java教程 | 6小时前 |
- Java环境配置区别详解
- 496浏览 收藏
-

- 文章 · java教程 | 6小时前 |
- Java评论系统开发教程详解
- 406浏览 收藏
-

- 文章 · java教程 | 7小时前 |
- Java中super调用父类方法详解
- 239浏览 收藏
-

- 文章 · java教程 | 7小时前 |
- Java实现文章收藏功能教程
- 284浏览 收藏
-

- 文章 · java教程 | 8小时前 |
- SpringBoot环境搭建教程详解
- 133浏览 收藏
-

- 文章 · java教程 | 9小时前 |
- JavaFilter实现登录验证教程
- 442浏览 收藏
-

- 文章 · java教程 | 9小时前 |
- ConcurrentSkipListMap并发排序Map解析
- 470浏览 收藏
查看更多
课程推荐
-

- 前端进阶之JavaScript设计模式
- 设计模式是开发人员在软件开发过程中面临一般问题时的解决方案,代表了最佳的实践。本课程的主打内容包括JS常见设计模式以及具体应用场景,打造一站式知识长龙服务,适合有JS基础的同学学习。
- 543次学习
-

- GO语言核心编程课程
- 本课程采用真实案例,全面具体可落地,从理论到实践,一步一步将GO核心编程技术、编程思想、底层实现融会贯通,使学习者贴近时代脉搏,做IT互联网时代的弄潮儿。
- 516次学习
-

- 简单聊聊mysql8与网络通信
- 如有问题加微信:Le-studyg;在课程中,我们将首先介绍MySQL8的新特性,包括性能优化、安全增强、新数据类型等,帮助学生快速熟悉MySQL8的最新功能。接着,我们将深入解析MySQL的网络通信机制,包括协议、连接管理、数据传输等,让
- 500次学习
-

- JavaScript正则表达式基础与实战
- 在任何一门编程语言中,正则表达式,都是一项重要的知识,它提供了高效的字符串匹配与捕获机制,可以极大的简化程序设计。
- 487次学习
-

- 从零制作响应式网站—Grid布局
- 本系列教程将展示从零制作一个假想的网络科技公司官网,分为导航,轮播,关于我们,成功案例,服务流程,团队介绍,数据部分,公司动态,底部信息等内容区块。网站整体采用CSSGrid布局,支持响应式,有流畅过渡和展现动画。
- 485次学习
查看更多
AI推荐
-
- ChatExcel酷表
- ChatExcel酷表是由北京大学团队打造的Excel聊天机器人,用自然语言操控表格,简化数据处理,告别繁琐操作,提升工作效率!适用于学生、上班族及政府人员。
- 3706次使用
-
- Any绘本
- 探索Any绘本(anypicturebook.com/zh),一款开源免费的AI绘本创作工具,基于Google Gemini与Flux AI模型,让您轻松创作个性化绘本。适用于家庭、教育、创作等多种场景,零门槛,高自由度,技术透明,本地可控。
- 3975次使用
-

- 可赞AI
- 可赞AI,AI驱动的办公可视化智能工具,助您轻松实现文本与可视化元素高效转化。无论是智能文档生成、多格式文本解析,还是一键生成专业图表、脑图、知识卡片,可赞AI都能让信息处理更清晰高效。覆盖数据汇报、会议纪要、内容营销等全场景,大幅提升办公效率,降低专业门槛,是您提升工作效率的得力助手。
- 3916次使用
-

- 星月写作
- 星月写作是国内首款聚焦中文网络小说创作的AI辅助工具,解决网文作者从构思到变现的全流程痛点。AI扫榜、专属模板、全链路适配,助力新人快速上手,资深作者效率倍增。
- 5090次使用
-

- MagicLight
- MagicLight.ai是全球首款叙事驱动型AI动画视频创作平台,专注于解决从故事想法到完整动画的全流程痛点。它通过自研AI模型,保障角色、风格、场景高度一致性,让零动画经验者也能高效产出专业级叙事内容。广泛适用于独立创作者、动画工作室、教育机构及企业营销,助您轻松实现创意落地与商业化。
- 4287次使用
查看更多
相关文章
-
- 提升Java功能开发效率的有力工具:微服务架构
- 2023-10-06 501浏览
-
- 掌握Java海康SDK二次开发的必备技巧
- 2023-10-01 501浏览
-
- 如何使用java实现桶排序算法
- 2023-10-03 501浏览
-
- Java开发实战经验:如何优化开发逻辑
- 2023-10-31 501浏览
-
- 如何使用Java中的Math.max()方法比较两个数的大小?
- 2023-11-18 501浏览


